Veeam Plugin for VCD
How to upgrade the Veeam Plugin
These instructions are for Service Providers explaining how to upgrade the Veeam Plugin for VCD to the latest version. The upgrade process can be broken down into these simple steps:
- Remove the current Veeam Plugin from VCD
- Follow normal plugin Installation/Configuration Steps
Removing the Veeam Plugin from VCD
Removal of the Veeam Plugin from VCD depends on the version of VCD that you're running. If you're running VCD 9.7 or newer, the recommended method would be using the VMware Plugin Lifecycle Manager. If you're running VCD 9.1 or 9.5, the recommended method would be using Python.
Using VMware Plugin Lifecycle Manager
- Open
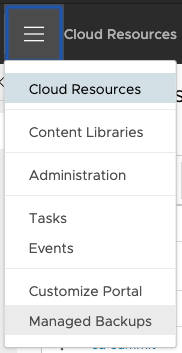
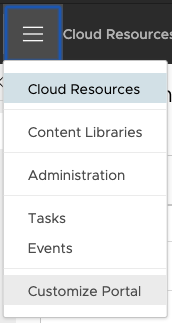
Customize PortalorPlugin Lifecycle Managementfrom the drop-down in the VCD Provider Portal- Example:
https://vcd.home.lab/provider
- Example:

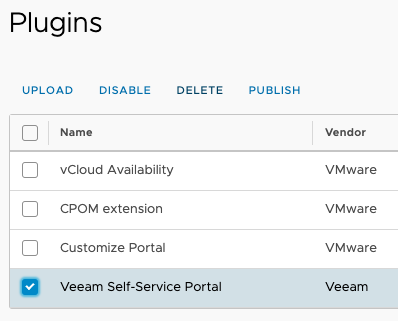
- Mark the checkbox next to the
Veeam Self-Service Portalplugin and clickDELETE

- Refresh your browser window (or logout/login to VCD)
- Verify the plugin no longer shows up in the drop-down for VCD

- You can now proceed with the normal plugin Installation/Configuration Steps
Using Python
Requirements
- Python 3.4+
- Python libraries required:
requests
Steps
- Download the current plugin
veeam-vcd-plugin-X.X.X.zip
- Unzip the plugin to your computer, open a terminal, & navigate to the plugin folder
- Modify the values in the
manage_plugin.jsonaccordingly for your VCD environment- System Administrator account is required
Sample manage_plugin.json:
{
  "username": "administrator",
  "org": "System",
  "password": "P@$$w0rd",
  "vcdUrlBase": "https://vmware.example.com"
}
- Execute the Python script below to list already install VCD plugins:
python3 ./manage_plugin.py list
- Find plugin named
Veeam Self-Service Portal by Veeamand copy theIDfield as shown below

- Execute the Python script below to remove the plugin from VCD:
python3 ./manage_plugin.py unregister <plugin-id>
- Refresh your browser window (or logout/login to VCD)
- Verify the plugin no longer shows up in the drop-down for VCD

- You can now proceed with the normal plugin Installation/Configuration Steps